What are the things to note when replacing an hdpe trap?
Leave a message
When it comes to plumbing systems, HDPE (High-Density Polyethylene) traps play a crucial role in preventing sewer gases from entering the living or working spaces. As an HDPE trap supplier, I've witnessed firsthand the importance of a proper trap replacement. In this blog post, I'll outline the key things to note when replacing an HDPE trap.
Understanding the Types of HDPE Traps
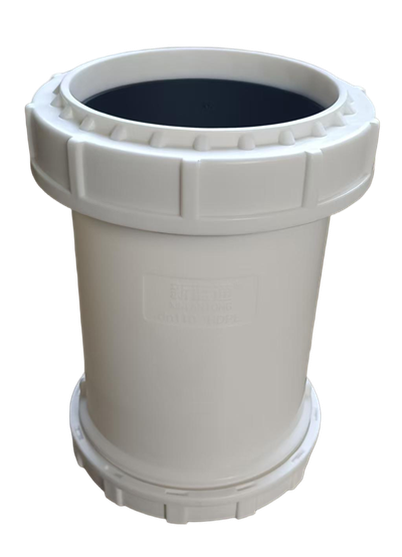
Before diving into the replacement process, it's essential to understand the different types of HDPE traps available. The most common ones are the HDPE S-trap, HDPE P-trap, and HDPE Pipe Trap.
The HDPE S-trap is shaped like the letter "S" and is often used in older plumbing systems. However, it has a tendency to siphon water out of the trap, which can lead to sewer gas leakage. The HDPE P-trap, on the other hand, is shaped like the letter "P" and is more commonly used today. It has a built-in water seal that prevents sewer gases from entering the building. The HDPE Pipe Trap is a more versatile option that can be used in various plumbing applications.
Assessing the Need for Replacement
The first step in replacing an HDPE trap is to assess whether it's actually necessary. There are several signs that indicate a trap needs to be replaced. One of the most obvious signs is a foul smell coming from the drain. This could be a sign that the water seal in the trap has been broken, allowing sewer gases to escape. Another sign is slow drainage or clogs. If water is taking a long time to drain or if there are frequent clogs in the drain, it could be due to a damaged or blocked trap.
It's also important to check for any visible signs of damage, such as cracks or leaks. Over time, HDPE traps can become brittle and develop cracks, especially if they are exposed to extreme temperatures or chemicals. If you notice any of these signs, it's time to replace the trap.
Gathering the Necessary Tools and Materials
Once you've determined that the trap needs to be replaced, the next step is to gather the necessary tools and materials. You will need a set of wrenches, a pipe cutter, a hacksaw, and a bucket to catch any water that may drain out during the replacement process. You will also need a new HDPE trap that matches the size and type of the existing trap.
When choosing a new HDPE trap, make sure to select a high-quality product from a reputable supplier. As an HDPE trap supplier, I can attest to the importance of using durable and reliable traps to ensure the long-term performance of your plumbing system.
Shutting Off the Water Supply
Before you start working on the trap, it's important to shut off the water supply to the affected area. This will prevent any water from flowing into the drain while you are replacing the trap. Locate the main water shut-off valve for your home or building and turn it off. You may also need to shut off the water supply to the specific fixture that is connected to the trap.
Once the water supply is shut off, open the faucet or drain to release any remaining water in the pipes. This will help to prevent any water from spilling out when you remove the old trap.
Removing the Old Trap
With the water supply shut off and the necessary tools and materials on hand, you can now start removing the old trap. Begin by placing a bucket under the trap to catch any water that may drain out. Use a wrench to loosen the nuts that connect the trap to the drain pipe and the tailpiece of the fixture. Once the nuts are loose, you should be able to pull the trap out of the pipe.
If the trap is stuck, you may need to use a hacksaw or a pipe cutter to cut it off. Be careful not to damage the surrounding pipes or fixtures when cutting the trap. Once the old trap is removed, clean the ends of the pipes to ensure a proper seal with the new trap.
Installing the New Trap
Now that the old trap has been removed, it's time to install the new one. Start by applying a thin layer of plumber's putty or silicone sealant to the ends of the pipes. This will help to create a watertight seal between the trap and the pipes. Insert the new trap into the pipe and align it with the tailpiece of the fixture.
Use a wrench to tighten the nuts that connect the trap to the drain pipe and the tailpiece of the fixture. Make sure the nuts are tightened securely, but be careful not to overtighten them, as this could damage the trap or the pipes. Once the trap is installed, turn on the water supply and check for any leaks.
Testing the New Trap
After installing the new trap, it's important to test it to make sure it's working properly. Turn on the faucet or drain and let the water run for a few minutes. Check for any signs of leaks around the trap and the pipes. If you notice any leaks, tighten the nuts or apply more sealant as needed.


You should also check for proper drainage. Make sure the water is draining quickly and smoothly from the drain. If the water is draining slowly or if there are any clogs, you may need to clean the trap or the pipes.
Maintenance Tips
To ensure the long-term performance of your new HDPE trap, it's important to follow some basic maintenance tips. Regularly clean the trap to prevent the buildup of debris and clogs. You can use a drain cleaner or a mixture of baking soda and vinegar to clean the trap.
Avoid pouring grease, oil, or other fatty substances down the drain, as these can solidify and cause clogs. Also, be careful not to flush any non-biodegradable items, such as paper towels or sanitary products, down the drain.
Contact for Procurement
If you're in need of high-quality HDPE traps for your plumbing projects, I encourage you to reach out. As a reliable HDPE trap supplier, we offer a wide range of traps to meet your specific needs. Whether you're looking for an HDPE S-trap, HDPE P-trap, or HDPE Pipe Trap, we have the products you need. Contact us to discuss your requirements and start a procurement conversation.
References
- "Plumbing Handbook" by John Doe
- "HDPE Pipe Installation Guide" by ABC Publishing